How to change and customise security settings
In today’s digital landscape, protecting your information and connections is essential.
Ensure maximum protection of your data and remote connections. Find out how to ensure a secure and reliable environment for your remote activities using Supremo.
Two-factor authentication for connections
Supremo allows you to enable two-factor authentication to protect your remote connections.
To enable this feature, go to Tools-Security and click on Enable two-factor authentication for connections.
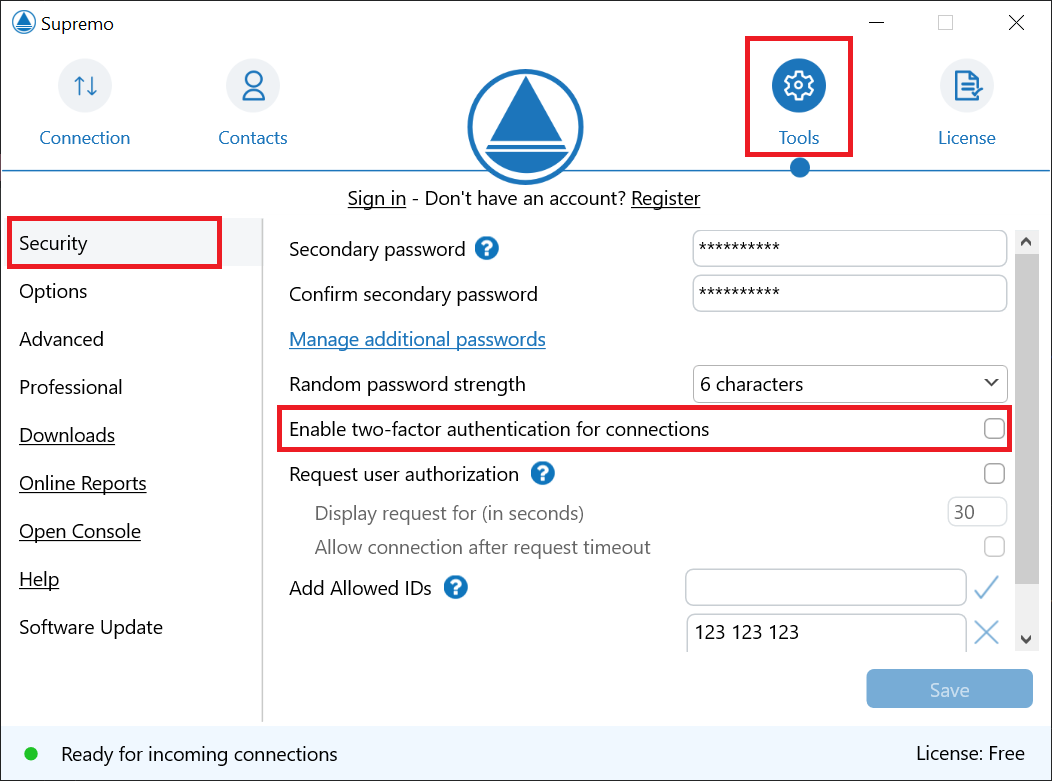
Now use an authentication app on your smartphone (e.g. Google authenticator) to add a new account by following the instructions below.
Enter the verification code and click on Enable.
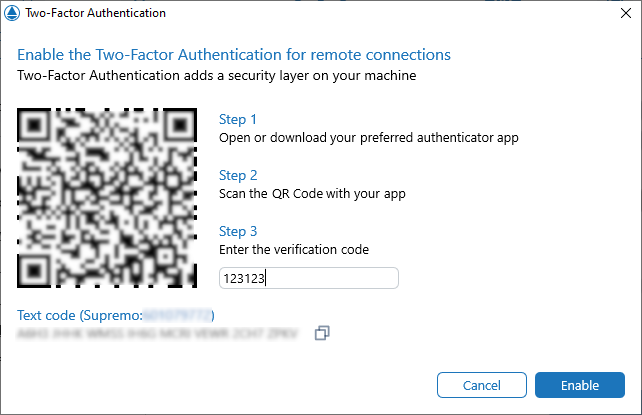
Authentication is activated!
Two-factor authentication for Reports and Address Book
In Supremo you can enable two-factor authentication to access your console account.
This security tool allows you to access your account only after confirming receipt of a token via an external authentication application.
To enable this tool, click on your account icon in the top right-hand corner by clicking on Security – Enable Two-Factor Authentication.


Now use an authentication app on your smartphone (e.g. Google authenticator) to add a new account by following the on-screen instructions.
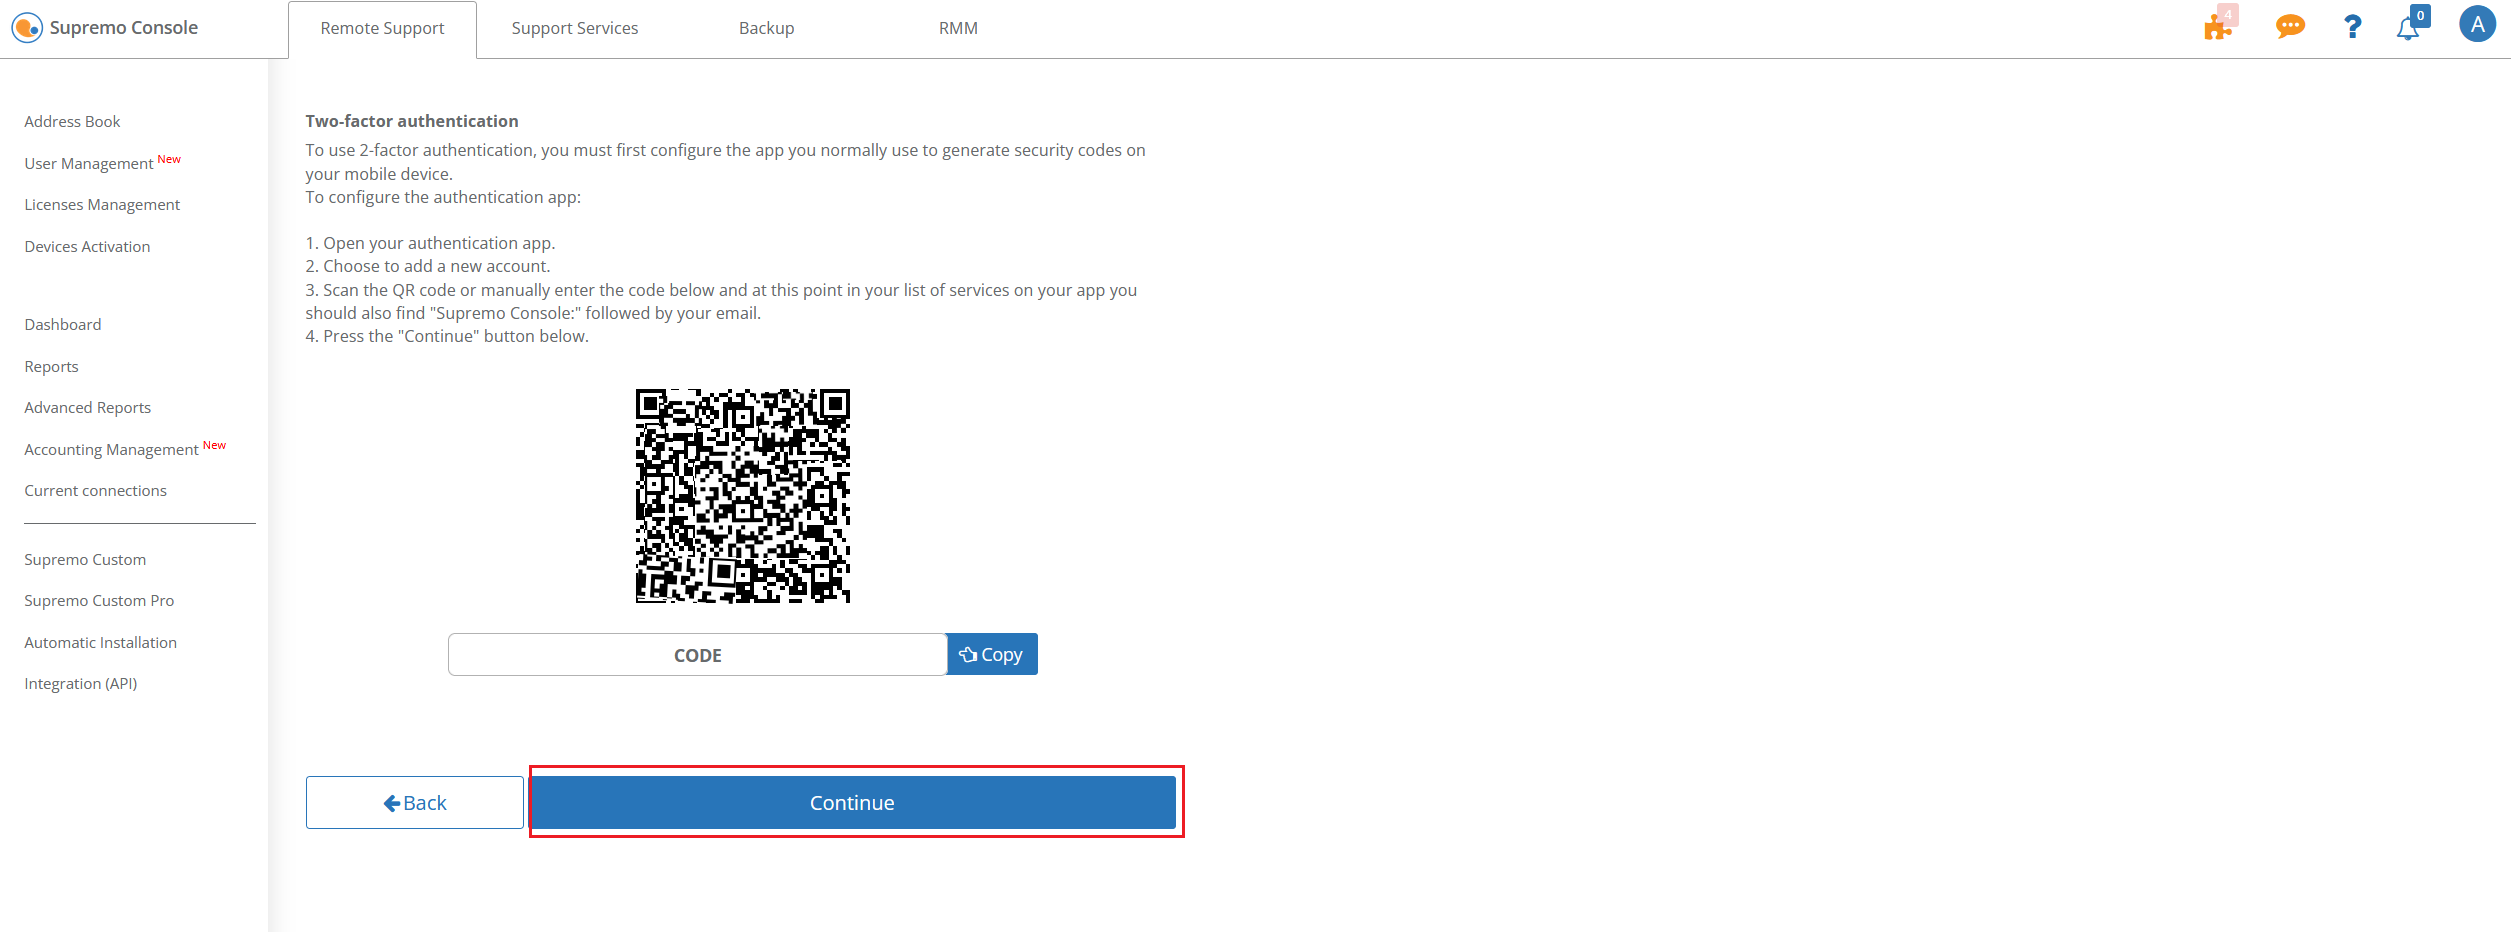
Enter the temporary security code generated by the authentication app into the appropriate field and click on Enable two-factor authentication.

Authentication is activated!
Changing the strength of the random password
In Supremo you can change the length of the automatically generated password, or disable it.
To change this parameter click on Tools-Security-Random password strength.
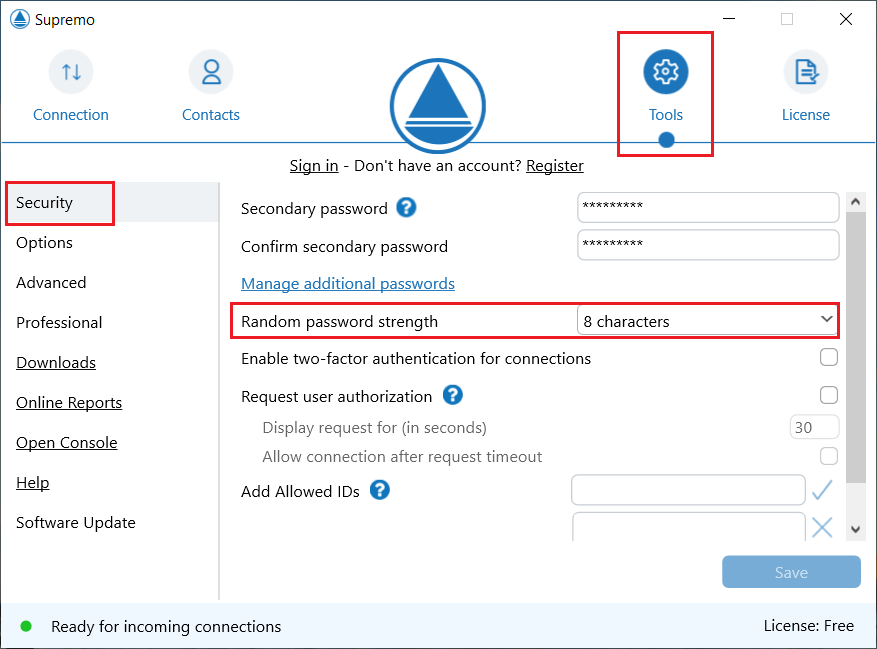
From the drop-down menu you can select the desired length or disable it.
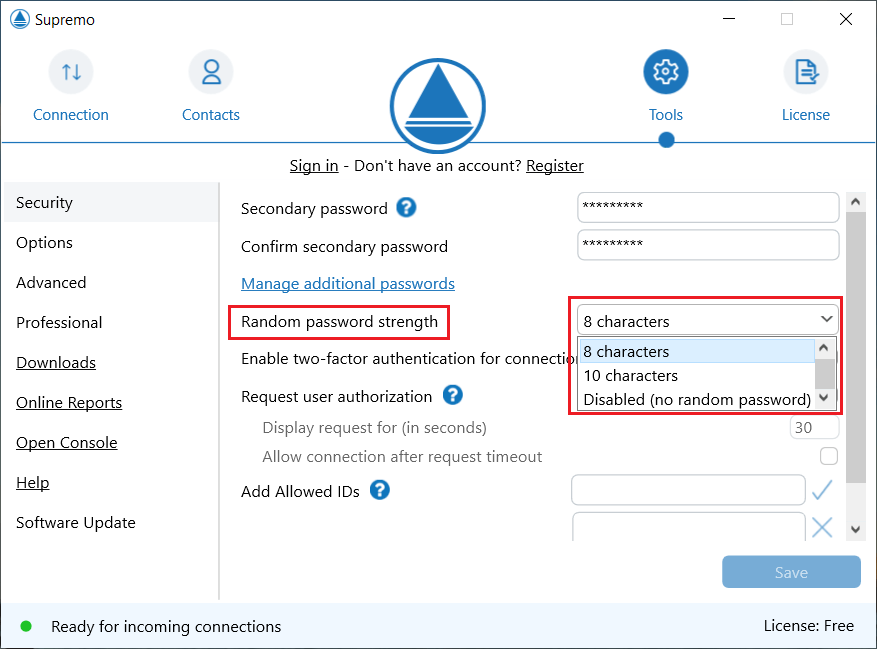
Then click on Save to confirm settings.
For more information, click here.
Selecting allowed IDs to connect
With Supremo you can select the Supremo IDs that can initiate a connection to the machine.
This security feature allows you to allow connections to a machine only from a predefined list of computers, preventing any other Supremo IDs from connecting.
You can enable the feature, from the Tools-Security menu, by typing the Supremo ID in the specific field and clicking on the V icon.
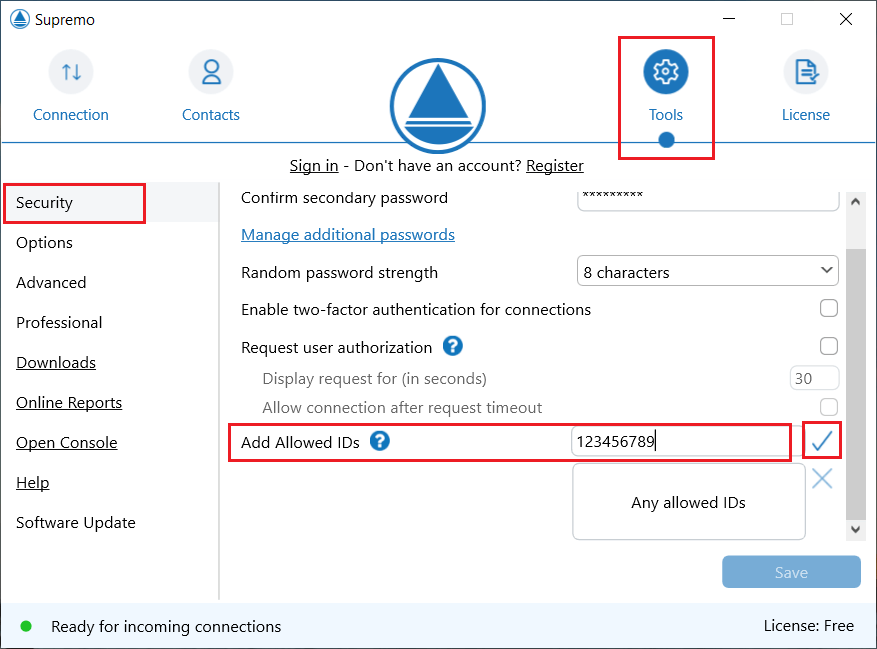
The permitted ID will then be visible in the second box. You can add as many IDs to the list as you wish.
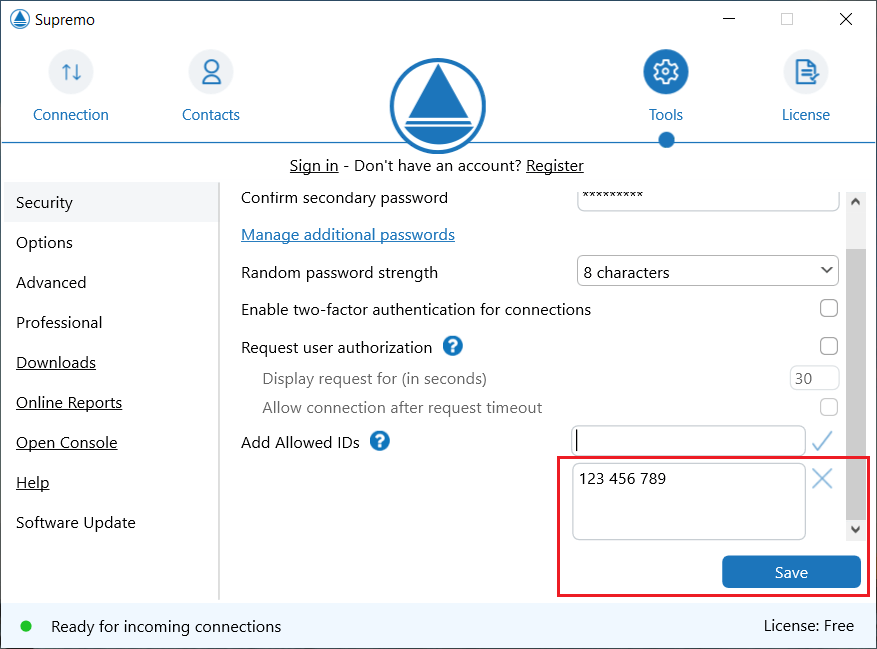
Finally, click on Save to confirm settings.
You can delete IDs from the list by selecting them and clicking on the X icon.
Request user authorization
In Supremo you can configure the connection authorization request. This means that the user of the remote computer must manually accept the incoming connection before a remote session can be started.
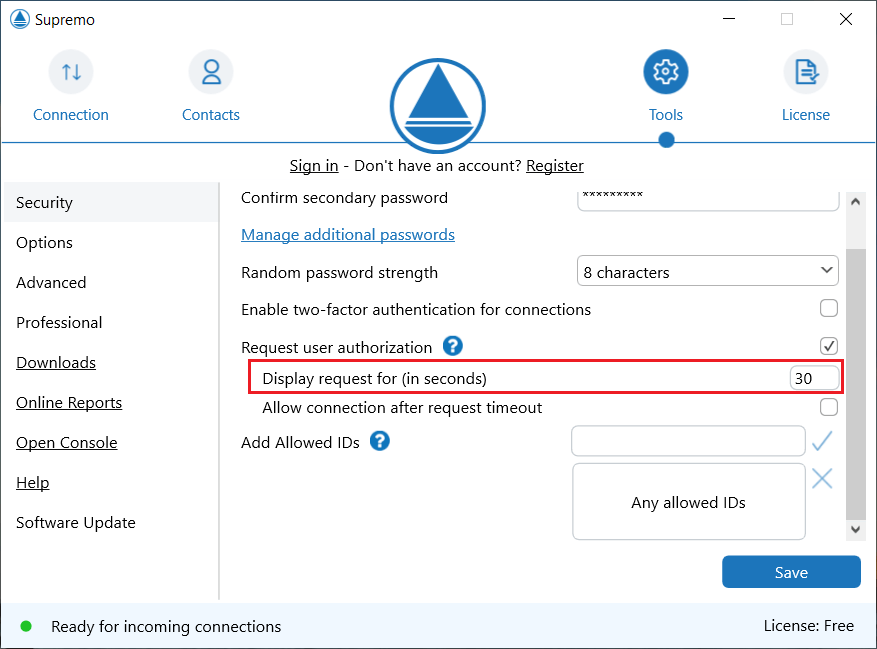
Click on Tools-Securityand enable the tick on Request user authorisation.
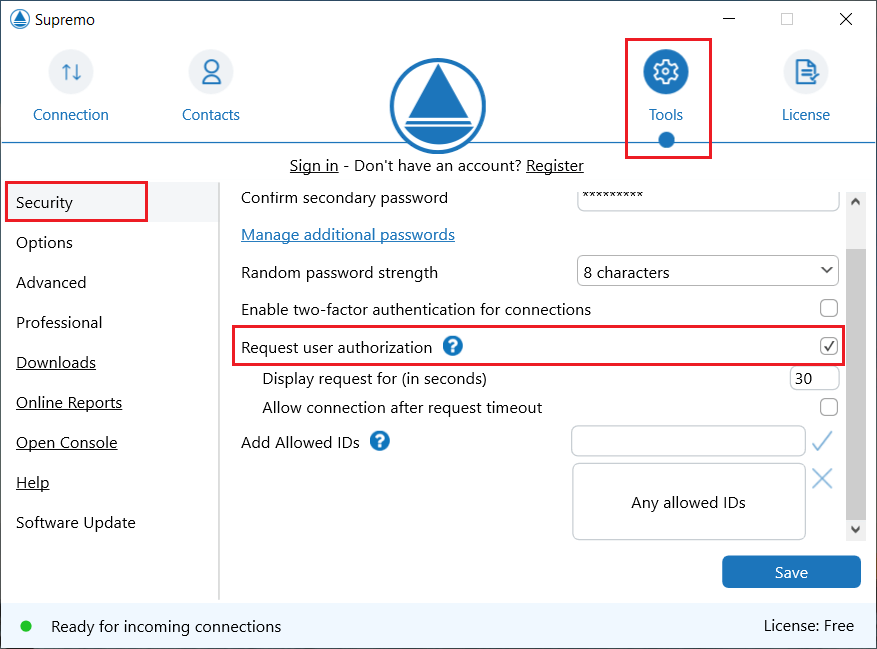
This option is not advisable in the case of unattended remote access.
You can choose the time interval, in seconds, at which the message will be displayed.
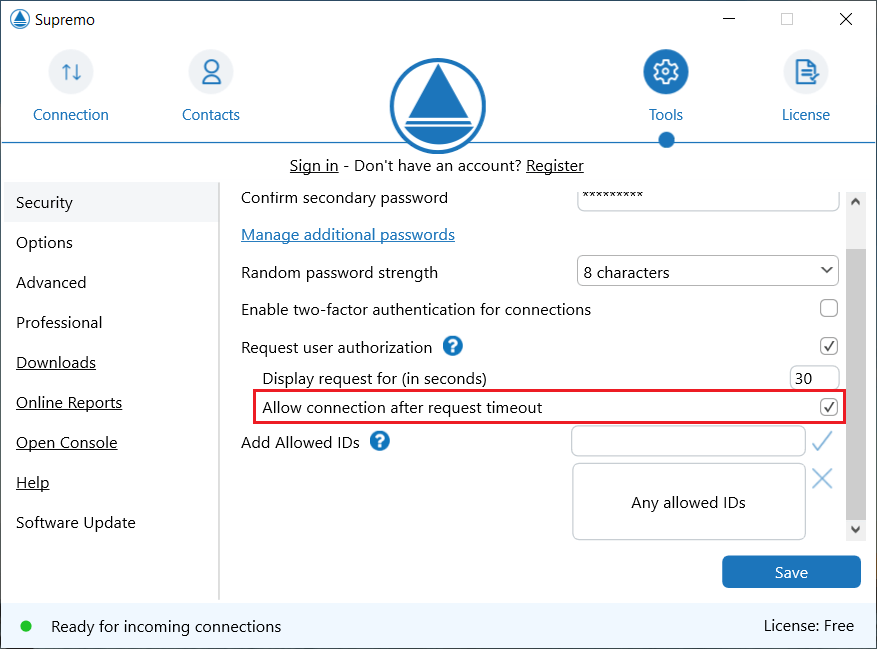
Checking Allow connection after request timeout will allow connection to the remote computer if the user does not respond to the request within the set timeout.
Finally, click on Save to confirm settings.

 Français
 Deutsch
 Italiano
 Português
 Español